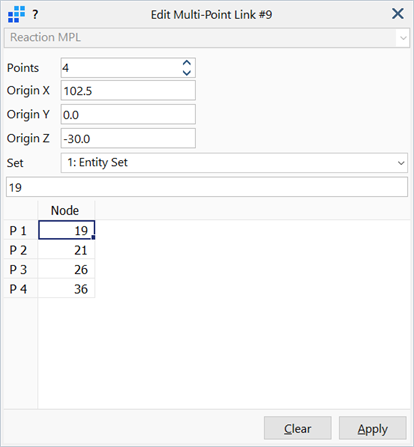
Edit: Multi-point Link

Description
Edits the connectivity of a multi-point link (MPL) in grid view using three steps as outlined below.
Connectivity of MPLs can also be edited using Edit: Element, which edits the link one node at a time.
1. Select MPL
An MPL is selected using the hot pointer.
The dialog updates to match the MPL type, and the grid lists all the nodes currently attached to the MPL.
2. Select New Nodes
The number of nodes attached to the MPL can be changed by setting the required number in the Points updown control.
The node numbers in the grid can be set in one of two ways:
- by editing the node numbers directly in the grid, or
- by clicking nodes in the model window to retrieve their numbers into the grid.
When retrieving node numbers from the model window, the number replaces the currently active cell in the grid. The active cell then automatically advances to the next node in the grid.
The currently active node can be changed at any time by clicking on the corresponding cell in the grid.
3. Apply
Clicking Apply checks the new link connectivity, and if it is valid, the MPL is updated.
Dialog
A different dialog is used for each MPL type. Each dialog contains the controls relevant to the properties of the selected type of MPL.
Specific controls for each link are described in the following topics:
- Edit: Interpolated MPL
- Edit: Master-Slave MPL
- Edit: Pinned MPL
- Edit: Rigid MPL
- Edit: User-Defined MPL
- Edit: Reaction MPL
See Also